MFTECmd (code name “Solved problem” ) is a command line MFT parser built around my MFT project, found here. I wrote this program for a lot of reasons to include getting to know NTFS better, wanting to fix deficiencies in other parsers, providing to the community a pure C# based implementation of an MFT parser, and so on. In short, I felt I could make learning about and providing a means for people to leverage the information inside the MFT in ways that other tools don’t. I also have plans to write a GUI based MFT viewer which will allow for an entirely different kind of interaction (think Technical details view in Registry Explorer).
My design goals for the project include:
- Parse all the data
- Expose all data when needed
- Balance the details extracted so as to benefit an examiner, but not overwhelm them
- Cross validate my findings against other MFT parsers (i.e. accuracy)
- Be fast!
During the development of this project I found and reported bugs for several other projects that deal with the MFT, some of which have been around for over a decade. Why do I bring this up? Because fresh eyes are never a bad thing. Strive to trust, but verify!
I would like to thank the people that tested things for me over the course of a week or so. A special shout out goes to Mike Pilkington who went above and beyond in helping out. It is much appreciated!
MFTECmd is pretty simple to use:

After supplying an MFT to parse via -f, one or both of the --csv and/or --de switches are required. --csv will dump out a CSV file containing information from the MFT across all available records. --de will dump all details about a given MFT entry/sequence number.
When comparing the results of MFT parsing tools, it is important to compare apples to apples. In other words, only rely on what is in the $MFT file itself when looking at results. Things like extended or non-resident attributes are not available with just the $MFT and as such, the results will look different when parsing the file system in a full disk image vs. just the $MFT.
The other thing to be aware of is that you will NOT see an entry per FILE record found. In some cases, entries are extension records for other records. In these cases, the extension record is automatically pulled into the base record and the base record is processed as a whole. Doing it the other way around causes a lot of problems and makes things look strange in that some entries will not show having a STANDARD_INFO, when in reality they do, etc.
This tool strives to present data to an examiner like you would expect to see as it relates to looking at a file system (vs a purely technical dump of the decoded bytes). You can of course always see all the entry details by using the corresponding switch to inspect any record you want (–de).
Exporting to CSV
First, lets look at exporting to CSV.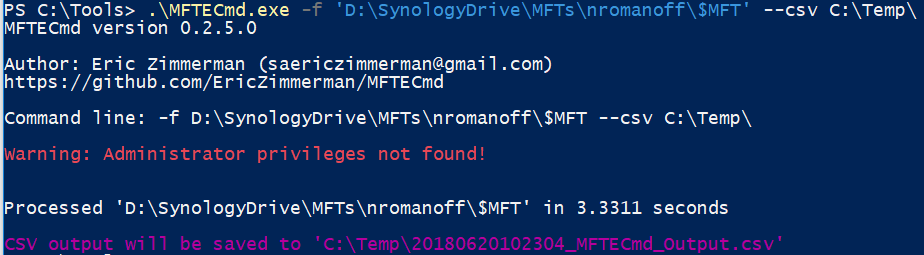
The raw output looks like this:
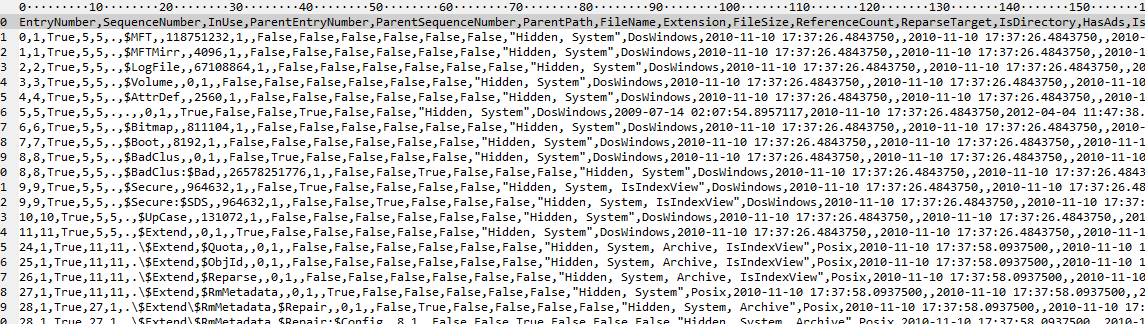
Things to notice here are the fact that we have sub-second precision and a variety of other Boolean properties, etc.
The other critical thing to note that is different from other tools is that MFTECmd creates a line in the CSV for every FILE_NAME attribute (OK, almost, short names are not included by default). Tools that do not take this approach do not get hard links correct (among other things). This approach also makes the output much less “horizontal” (i.e. tons of columns to scroll thru).
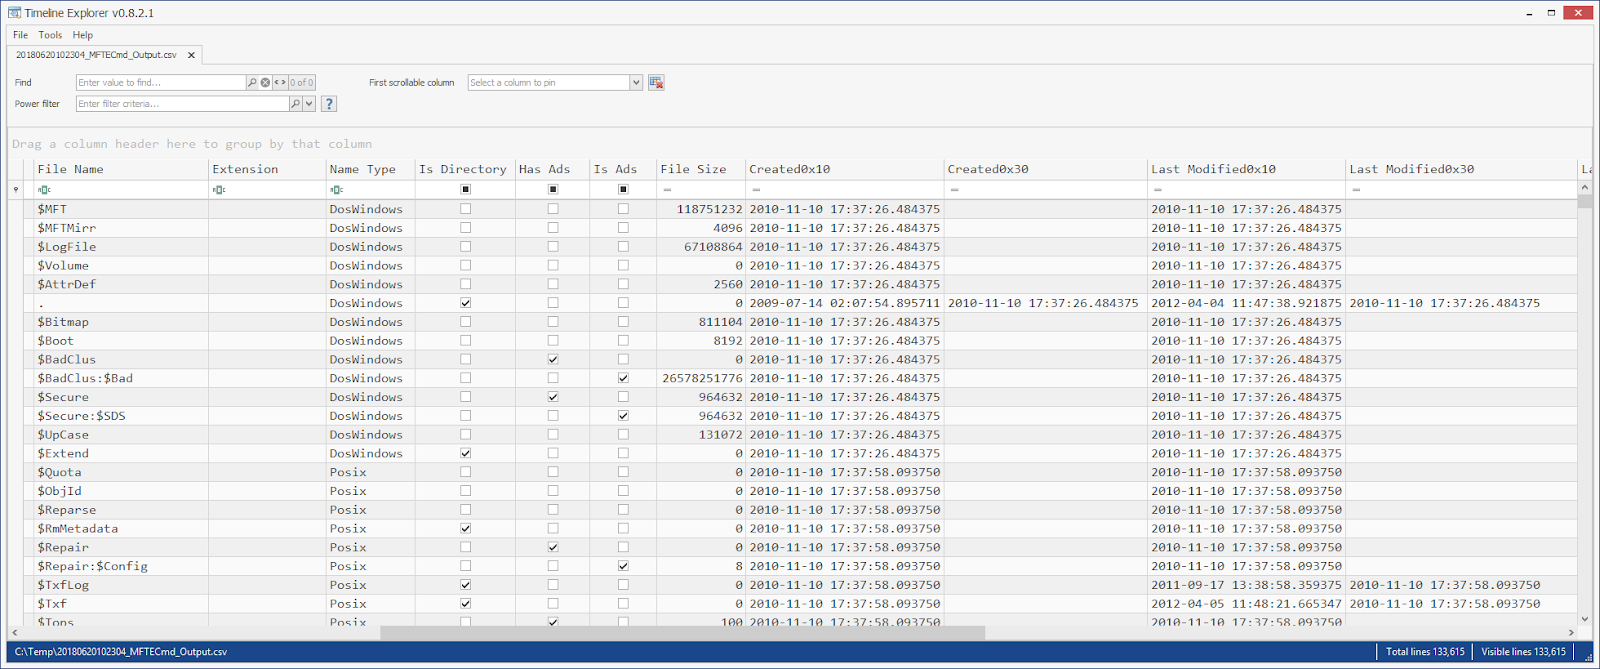
While this data can be pulled into Excel by double clicking it (or via Data | Import. NOTE: when importing via this method, Excel messes up any embedded CRLFs in things like ADSs, etc.), it looks best when viewed in Timeline Explorer.
If we drop the file into TLE, we get this:

Because of the amount of data available in the MFT, a balance has to be sought when exporting information. The following data is exported to CSV. Some of these fields are self explanatory and do not include any elaboration.
EntryNumber
SequenceNumber
InUse: Whether the record is free or not
ParentEntryNumber
ParentSequenceNumber
ParentPath: Full path to the parent directory (NOT the absolute path to the file itself)
FileName:
Extension: For non-directories, the file extension, if any.
FileSize: The size of the file, in bytes. For an ADS, it is the size of the ADS
ReferenceCount: This is NOT the value stored in the MFT record, as it is usually not correct at all. rather, this number is calculated by looking at all non-DOS FILE_NAME records and finding the total number of unique parent MFT references that exist (i.e. hard links)
ReparseTarget: Where a reparse point redirects to
IsDirectory: True if this entry is for a directory, false for a file
HasAds: True if this entry has one or more ADSs
IsAds: True if the details being displayed correspond to an ADS. While an ADS technically doesn’t have any timestamp associated with it as far as created/modified, etc. the corresponding FILE_NAME’s details are used. This may change in the future and the timestamps will not be shown for ADSs
SI<FN: True if the STANDARD_INFO created or last modified is less than the corresponding FILE_NAME time
uSecZeros: True if STANDARD_INFO created, modified, or last access has 0s for sub-second precision
Copied: True if STANDARD_INFO modified < STANDARD_INFO created time
SiFlags: Things like “hidden” or “system”, etc.
NameType: DOS, Windows, Posix, etc.
Created0x10: STANDARD_INFO created timestamp
Created0x30: FILE_NAME created timestamp
LastModified0x10
LastModified0x30
LastRecordChange0x10
LastRecordChange0x30
LastAccess0x10
LastAccess0x30
UpdateSequenceNumber
LogfileSequenceNumber
SecurityId: Offset pointing into $Secure
ObjectIdFileDroid
LoggedUtilStream
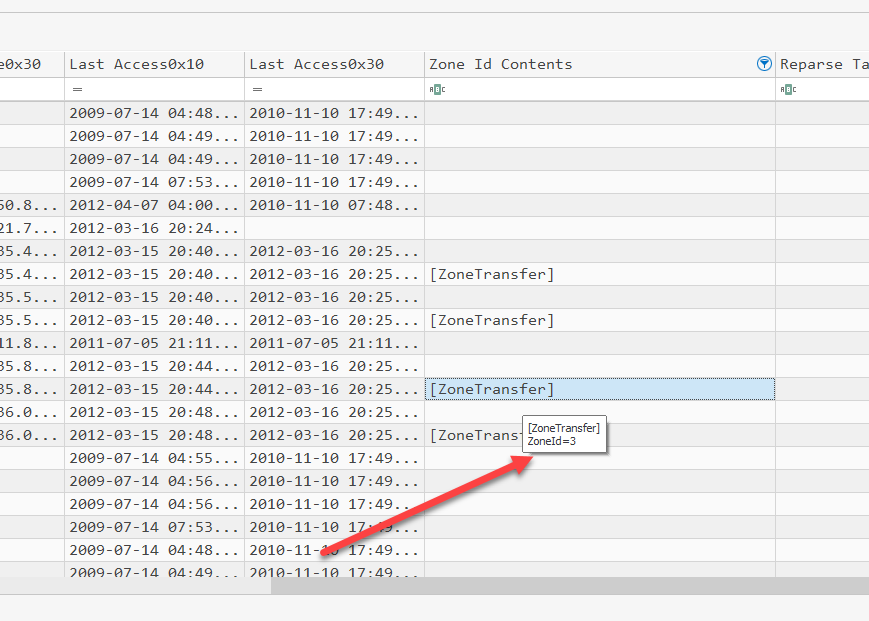
ZoneIdContents: For ADSs with a name of “Zone.Identifier”, the contents of the ADS are extracted and saved to this column. This allows you to see the Zone ID and in some cases, the origin of where a particular file came from (URL will be included in the ADS).
Note that the Created timestamps are next to each other vs having all the STANDARD_INFO timestamps next to each other. This serves several purposes, but the biggest one would be the ability to quickly compare the 0x10 attribute to the 0x30 attribute. If you do not like this arrangement, simply drag the columns however you like in TLE and that order will be persisted. Some of the lesser used columns above are also hidden by default in TLE.
Let’s take a closer look at some of these columns.
In the example below, notice how many of the Created0x30 columns are blank. This is because those timestamps are EXACTLY the same as the Created0x10 timestamp. When the 0x30 matches the corresponding timestamp from the 0x10 column, the 0x30 value is left blank. This provides several benefits including a much smaller file size, but the primary benefit is a lot less noise to have to wade through when looking for and examining entries where the two timestamps do NOT match.
When looking at the contents of the Zone Id Contents column, it is often helpful to see the contents of the entire ADS. Since the ADS contains embedded CRLFs, this becomes difficult to represent, but if you hover over the value, a tool-tip is displayed showing the entire contents. Of course, if you filtered in the column header for ZoneID=4 for example, only rows containing that value would be displayed.
While I could change the /r/n found in the ADS, this would be changing data and I am very hesitant to do that. I will most likely try to come up with a different way to display this data. You can also select relevant cells and then use CTRL-v to copy the contents of the Zone Id Contents cells to the clipboard.
Because TLE allows you to group by columns, you can do things like this too:
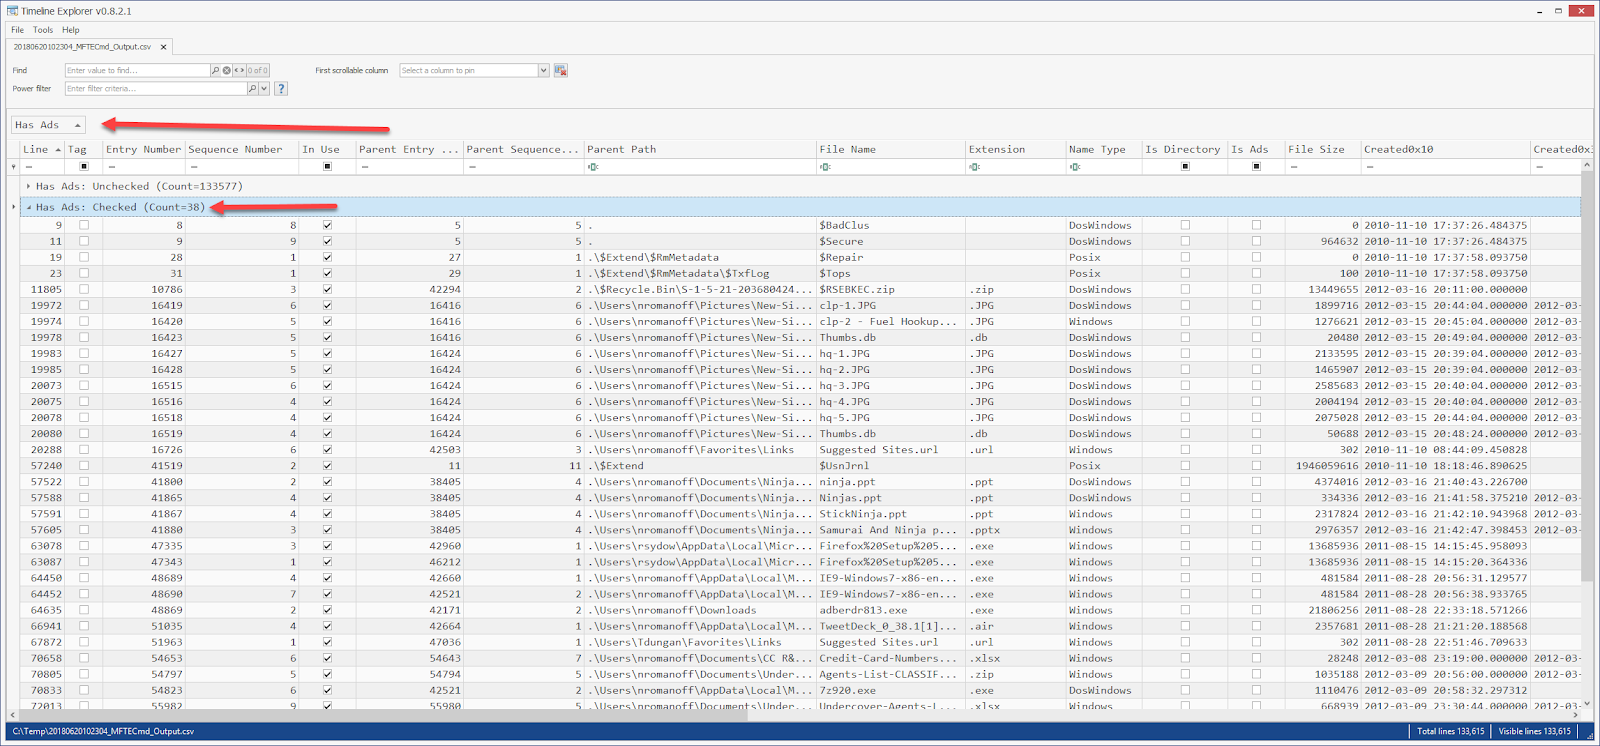
Here we grouped by the HasAds column and expanded the group where this condition is true. The entries in this group are the files that have ADSs attached to them. The same could be done for the IsAds column as well (in addition to Copied, Timestomped, etc.)
Grouping by different columns has all kinds of potential uses. You can even group by more than one column at once (IsAds, then by Extension, for example).
To illustrate another awesome way to view data in TLE, check out what happens when we group by Zone Id Contents column:
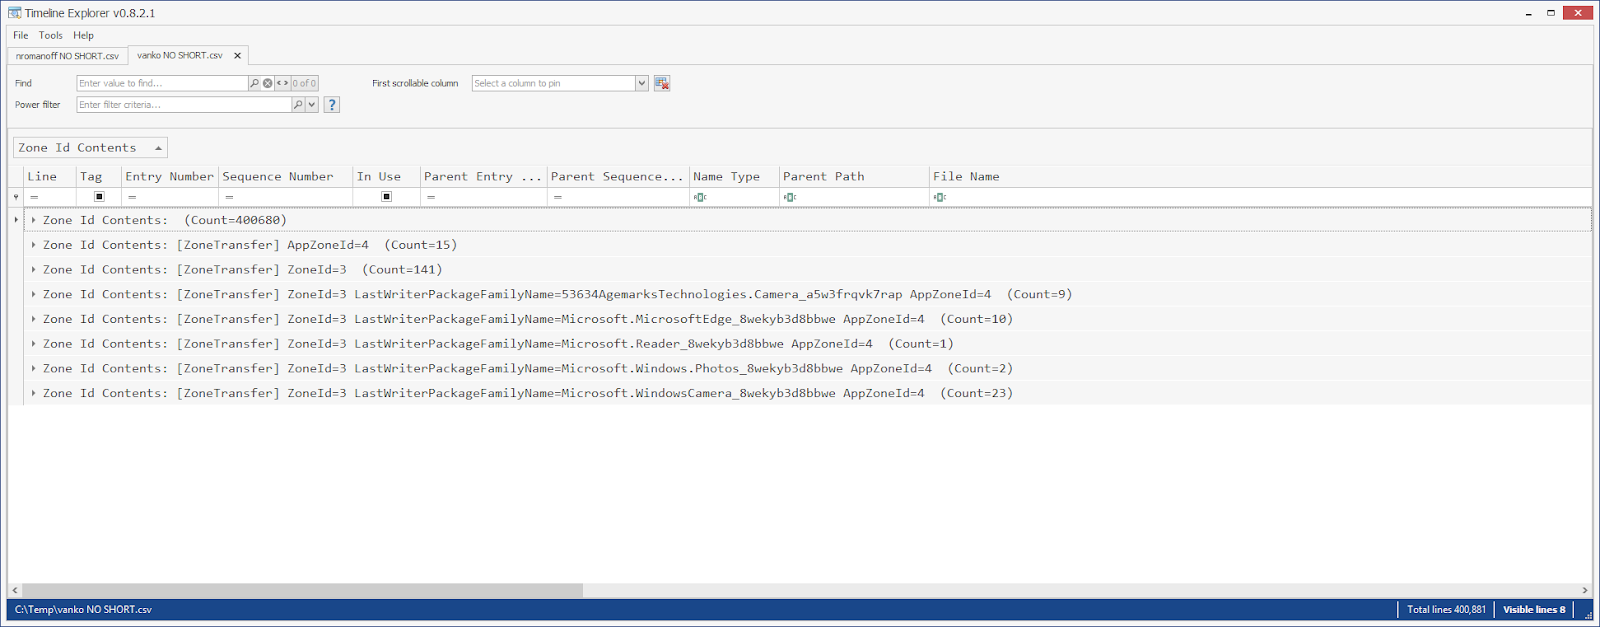
While it can be difficult to see the full contents of the column in the normal view due to the CRLFs present, when we creatively group, things just fall out for us to find! =)
Getting entry details
The -de switch dumps all the details about a given entry and sequence number. Let’s look at an example.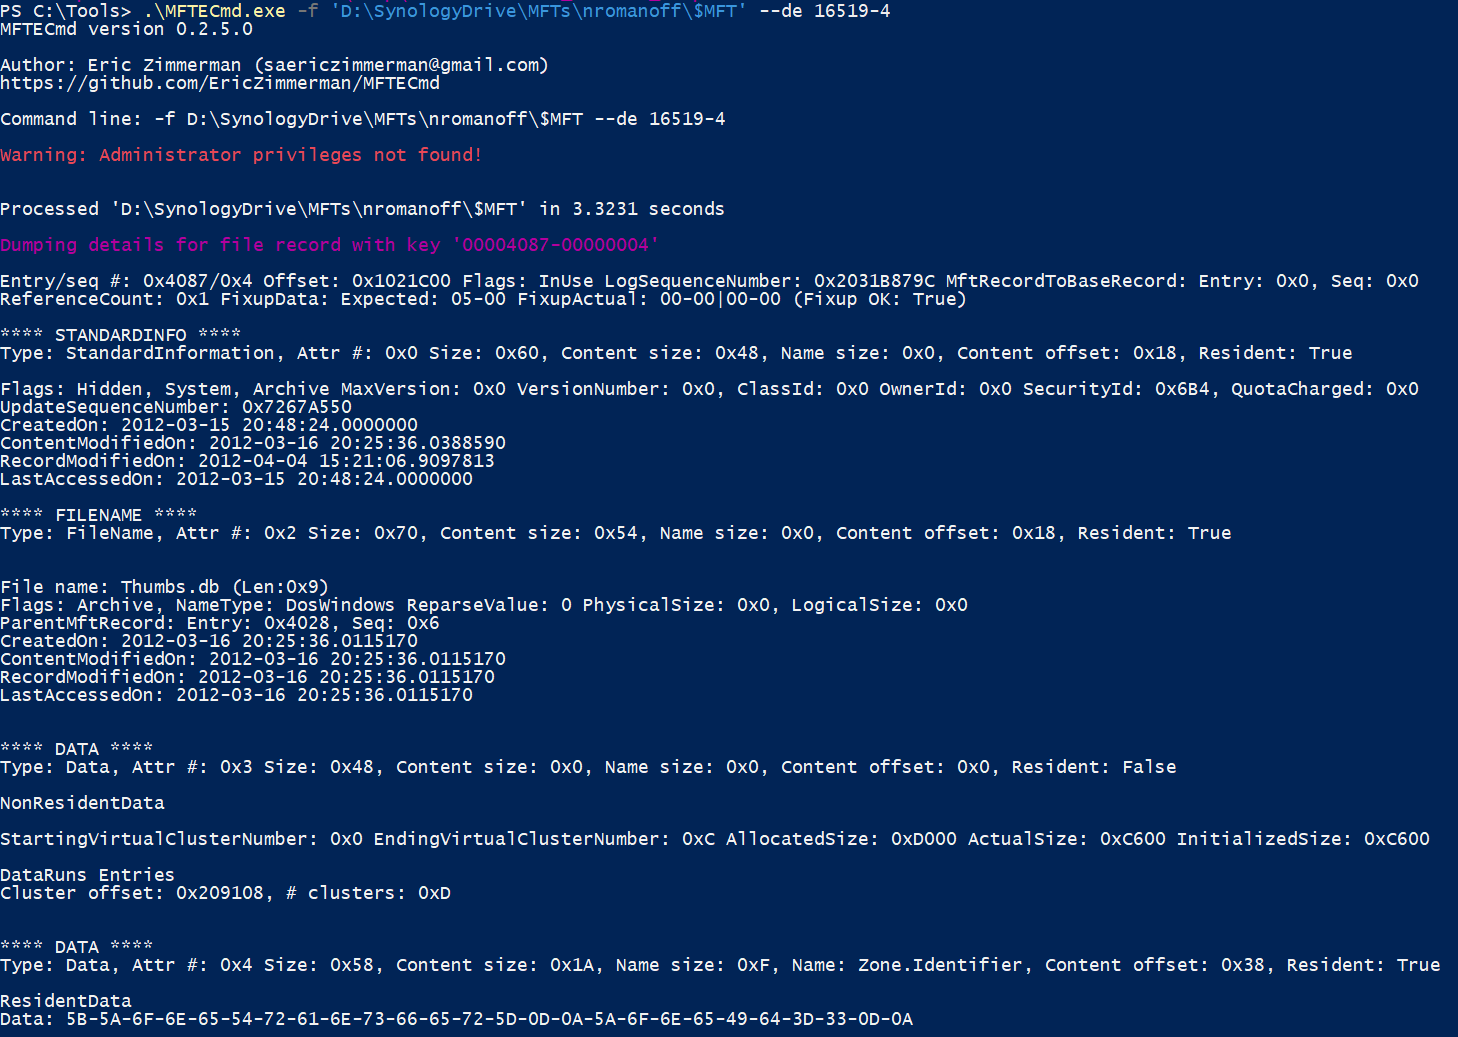
–de is generally used to inspect all the details after reviewing the CSV output. --de accepts both hex and decimal notation as well.
In the above output, you can see all the details related to the entry including information from the header and all of the attributes. Notice that the second DATA attribute has a Name (Zone.Identifier) which means this is an ADS. You can also see the CRLFs in the DATA bytes (0D-0A).
Wrapping up
When dealing with free entries, the parser will attempt to locate a directory to associate the free file or directory to based on the FILE_NAME parent MFT reference info. In the cases where this data is no longer available however, the file will be placed in a “.\PathUnknown\Directory with ID 0x0000<entry #>-<seq #>” parent directory. Some examples look like this: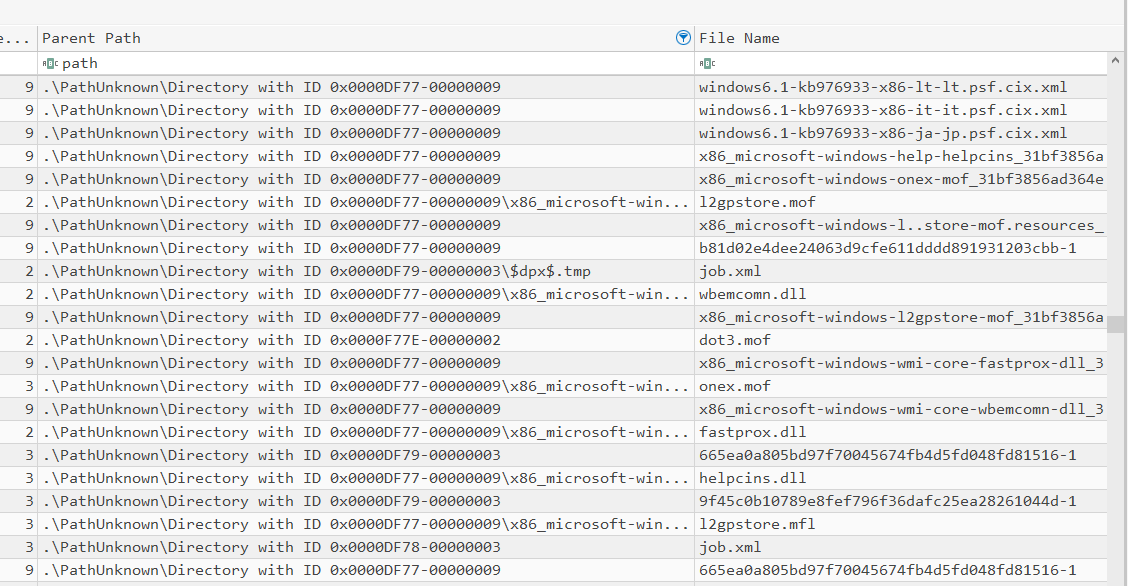
In my testing (and others as well), MFTECmd is at least 5-10 times faster than anything else out there. As the saying goes however, speed is fine, but accuracy is final. In this case tho, MFTECmd is both accurate AND fast.
If you run into an issue, try the --vl switch to narrow down where the issue lies and PLEASE consider sharing either the MFT itself or at least the FILE record so I can fix the issue.
You can get MFTECmd from the usual place and a Chocolatey package has been submitted as well.
Article Link: https://binaryforay.blogspot.com/2018/06/introducing-mftecmd.html